This page is Appy's Hello world. It will allow you to create and launch a simple webapp with Appy.
As already stated, Appy is about Python code, but with a conceptual grounding.
With Appy, we will not start by defining a way to execute some Python method when some URL is hit.
No.
This method's result will not be a page built using some templating language.
No.
With Appy, we will start by building a conceptual model, like a class diagram, but with no diagram: with code.
The example used in this page will constitute a basis for the whole Appy documentation. It is about an app allowing to manage official meetings like city councils or entreprises' boards of directors. Such a meeting follows these steps:
- Items (= subjets to be discussed during meetings), are, in a first step, proposed by the various services or departments that come into play within the entity using the app.
- Items follow a validation process within each service.
- A meeting manager then collects all validated items and builds a meeting agenda by inserting these items into a meeting.
- The meeting agenda is published.
- The meeting takes place.
- A decision is taken for every item.
- At the end of the meeting, or some hours or days later, meeting minutes are published.
In this page, we will concentrate on the notion of item, and build a simple app allowing to create and update such items.
The app's class diagram will be a simple as this unique class:
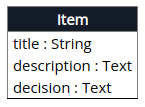
The title will store a one-line summary about the subject to discuss; the description will give more details about it, as a bunch of textual paragraphs; the decision, initially empty, will hold another bunch of paragraphs that wil hold the decision taken by participants during the meeting, about this item.
How to implement, with Appy, an app based on such a class diagram ?
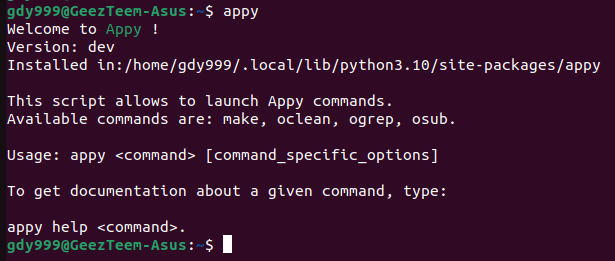
After having installed Appy, a program named appy should be in your path:
Let's call our app Sessions. On my machine, I will create it in the base folder containing all my Appy projects: /home/gdy999/projects. Create the Sessions app by typing the following command, in the corresponding folder on your machine:
appy make app /home/gdy999/projects/Sessions
Let's have a look at what has been created there.
cd /home/gdy999/projects/Sessions
ls

This folder is a standard Python package, with a __init__.py file.
- The static folder will contain all static resources for your project, like CSS/JS files, or images.
- The tr folder will contain translation files, containing i18n labels used in your app and their translations in the language·s supported by your app. i18n is a classical shorthand for internationalization (a word made of 18 chars).
- The make script is to be executed every time your code-based class diagram evolves: indeed, it will automatically synchronize, in the tr folder, i18n labels corresponding to any concept appearing in the user interface, like a class or attribute name. I called it make to honour the historical homonym executable that I used extensively a the start of my career, when I was a C developer. My make variant has, of course, nothing to do with creating object libraries and binding them.
In this folder, create a file named Item.py, with the following content.
#- - - - - - - - - - - - - - - - - - - - - - - - - - - - - - - - - - - - - - - -
from appy.all import *

#- - - - - - - - - - - - - - - - - - - - - - - - - - - - - - - - - - - - - - - -
class Item:
    description = Text()
    decision = Text()
#- - - - - - - - - - - - - - - - - - - - - - - - - - - - - - - - - - - - - - - -
I know, this is so simple. This is why I have added comment lines made of 80 chars. Else, it would not have been considered serious code.
Beyond being myself completely unable to write a line of code made of more than 80 chars, I'm not a fan of import * statements. But I think every framework creator has the right to propose using such a statement, once in his life. And I'm using this right, right now. Using a framework is a very special, almost intimate thing. This privileged relationship between your code and mine deserves an import *. But this should be the only usage of such a statement throughout your whole Appy app. Else, I will get angry and jealous.
As you can see, an Appy class does not need to explicitly inherit from any base class. It will be recognized by Appy as a class being part of your code-based class diagram, as soon as one static attribute will be defined on it, like description or decision, being an instance of any Appy Field sub-class, like the Text class in this case. Such fields represent special class attributes for which a HTML widget will be rendered, allowing to encode and visualize the field value in the Appy User Interface, I mean: the browser! (we will see later on that Appy proposes other interfaces, like a XML-based one).
But, wait ! I forgot the title attribute. In fact, no, this wasn't an omission. The title attribute is part of the base set of attributes any Appy class receives, at birth. It is important because it will be used as basis to produce (HTML) links to the corresponding object.
We have now reached our objective to produce a first, simple and complete app. It is made of 4 lines of code, 3 essential comment lines and one blank line. Use the make script to ensure i18n labels are up-to-date:
cd /home/gdy999/projects/Sessions
./make
You should get this kind of output:
Updating /home/gdy999/projects/Sessions...
Model loaded (app) - 1 class(es) - 0 workflow(s).
Sessions.pot - 8 added message(s): Item,Item_plural,Item_title,Item_description,Item_description_descr,Item_decision,Item_decision_descr,Item_page_main.
Translation files updated - 8 labels (8 automatic + 0 custom) - 1 language(s).
 Python: 2 files, 38 lines (32% comments, 11% blank)
 Total (including commented and blank): *** 38 ***
Done.
Some i18n labels have been added (see files in the tr sub-folder), mainly related to the name of your class and its attributes. Some basic metrics about your code have been computed: you have an idea of how big and commented your code is. Here, the total count is 38 and not 8, because lines of code from __init__.py were also counted.
Now that we have build and updated our app, it is time to think about creating a site, in order to deploy the app for one of my favourite clients: the city of Malonne.
Before deploying it on one of the city servers, it is wise to create a development site on your local machine.
On my machine, I will create a site named Malonne in the base folder containing all my Appy sites: /home/gdy999/sites, with the following command.
appy make site /home/gdy999/sites/Malonne -a /home/gdy999/projects/Sessions
The command needs to know what app to run: it must be specified via the -a option.
Let's have a look at what has been created there.
cd /home/gdy999/sites/Malonne
ls

File config.py is the part of the configuration being specific to the site. It generally contains any non-versionable stuff like the port onto which the site runs (by default, 8000), and things like credentials for connecting to some LDAP server or other external systems like SMTP servers.
- Folder bin contains 2 scripts:
- site allows to start / stop the site.
- ./site start runs it in the background;
- ./site stop stops a site running in the background;
- ./site fg runs a site in the foreground: its output is visible in the terminal; stopping a site running in this mode is done by hitting Ctlr-C.
- deploy is a script allowing to deploy an app to one or several distant site·s. The idea behind this script is to provide a simple way to control deployments to distant servers (production / acceptance / ... environments) from a development site on a developer machine.
- Folder lib, empty for a default site, allows to bind additional Python libraries.
- Folder var contains data produced and managed by the site. It contains the following files.
- Log file app.log is the log being specific to your app, filled by Appy for some base actions, and completed by your own calls to log methods.
- Log file site.log records all hits (HTTP GET and POST commands) to your site.
- File appy.fs is the main database file. Appy makes use of the Zope Object database (ZODB), an object-oriented database making data persistency as transparent as possible for the developer.
- Files appy.fs.* are internal database-related files created and controlled by the ZODB.
- Sub-folders whose names are numbers may be present in this folder for storing database-controlled binary files.
Everything is now ready to run our site. Go to the site's bin sub-folder and run it!
cd /home/gdy999/sites/Malonne/bin
./site fg
You should see output like this:
2023/03/24 21:10:31 | INFO | /home/gdy999/sites/Malonne/var/app.log created.
2023/03/24 21:10:31 | INFO | :: Starting server ::
2023/03/24 21:10:31 | INFO | Appy is "dev".
2023/03/24 21:10:31 | INFO | Model loaded (base+app) - 10 classes - 4 workflows - 504 labels.
2023/03/24 21:10:31 | INFO | Database created @/home/gdy999/sites/Malonne/var/appy.fs.
2023/03/24 21:10:31 | INFO | system | > Catalog created for class "Item".
2023/03/24 21:10:31 | INFO | system | > Class Item: indexes "searchable", "title", "creator", "created", "modified", "state", "allowed", "cid" created.
2023/03/24 21:10:31 | INFO | system | > Catalog created for class "Page".
2023/03/24 21:10:31 | INFO | system | > Class Page: indexes "searchable", "title", "creator", "created", "modified", "state", "allowed", "cid" created.
2023/03/24 21:10:31 | INFO | system | > Catalog created for class "User".
2023/03/24 21:10:31 | INFO | system | > Class User: indexes "searchable", "title", "creator", "created", "modified", "state", "allowed", "cid", "login", "roles" created.
2023/03/24 21:10:31 | INFO | system | > Catalog created for class "Group".
2023/03/24 21:10:31 | INFO | system | > Class Group: indexes "searchable", "title", "creator", "created", "modified", "state", "allowed", "cid", "login", "roles" created.
2023/03/24 21:10:31 | INFO | system | > User "admin" created.
2023/03/24 21:10:31 | INFO | system | > User "system" created.
2023/03/24 21:10:31 | INFO | system | > User "anon" created.
2023/03/24 21:10:31 | INFO | system | > Group "admins" created.
2023/03/24 21:10:31 | INFO | system | > Translation file for "en" loaded - 504 messages.
2023/03/24 21:10:31 | INFO | 2 CSS + 64 SVG files loaded in RAM (91,6 Kb).
2023/03/24 21:10:31 | INFO | 0.0.0.0:8000 ready (process ID 9819).
Congratulations, your first Appy app is up-and-running, on port 8000.
What happened here?
- Log and database files were created because it was the first time the site was launched.
- Database indexes were created. We will explain these indexes later on. You may notice that the output mentions classes not being part of your model, like Page, User or Group. This is because Appy injects, within any app model, a predefined set of classes. One of these classes is the User class, allowing to define an app's users. Users may be added into groups. We will see that Appy includes a complete security model. Class Page allows to create web pages.
- 3 basic users have been created.
- admin is... you. His default password is admin. Don't forget to change it on real servers, else, I will kill you.
- system is a technical user representing the site himself. Any action performed by the site (like these actions at site startup) are performed in the name of this user.
- anon represents the anonymous user. Any hit on your server made by a not-authenticated user will correspond to that user.
Open your favourite web browser and go to http://localhost:8000. You should see something like this.
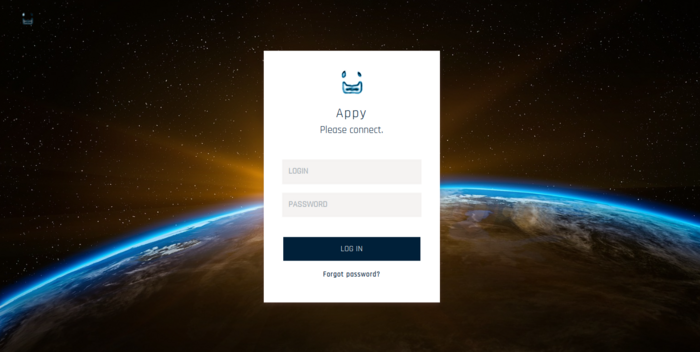
Log in with the admin user.
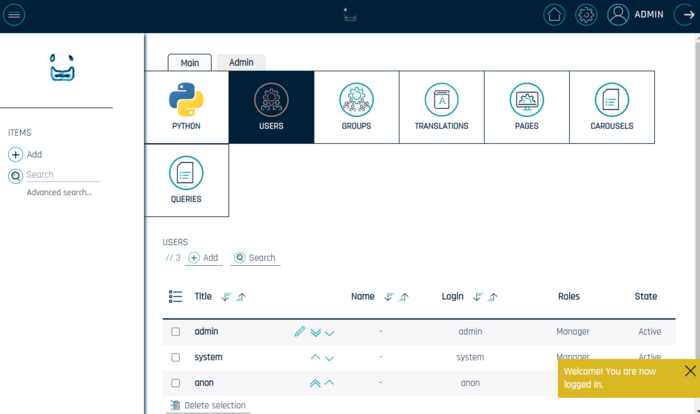
As Manager (the more powerful role in an Appy app), your default page, once connected, is the Appy configuration panel.
Goddamned, it looks like the Appy framework site! You have understood how monomaniac I am: https://appyframe.work is made with Appy itself.
Feel free to explore your first Appy app. You will see that everything is there for creating, updating, consulting and searching items.
For example, the form for creating a new item looks like this:
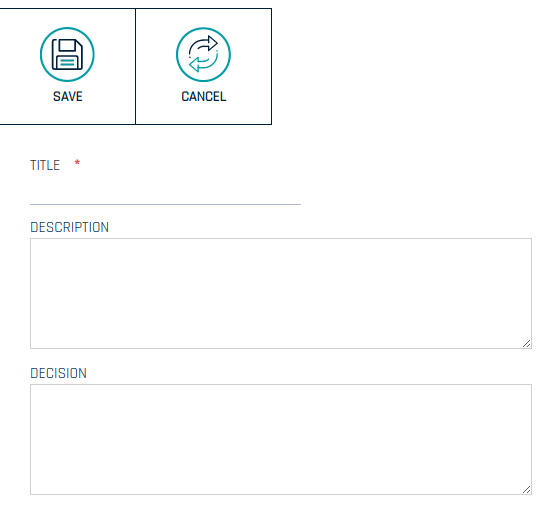
Every form element is rendered according to the corresponding field on the Appy class.


